
Perfect for Back to School name plates or Pre-K name recognition!
Materials Needed:
- printed name on white paper (card stock works well)
- white glue
- crayons
- water colour paints and brush
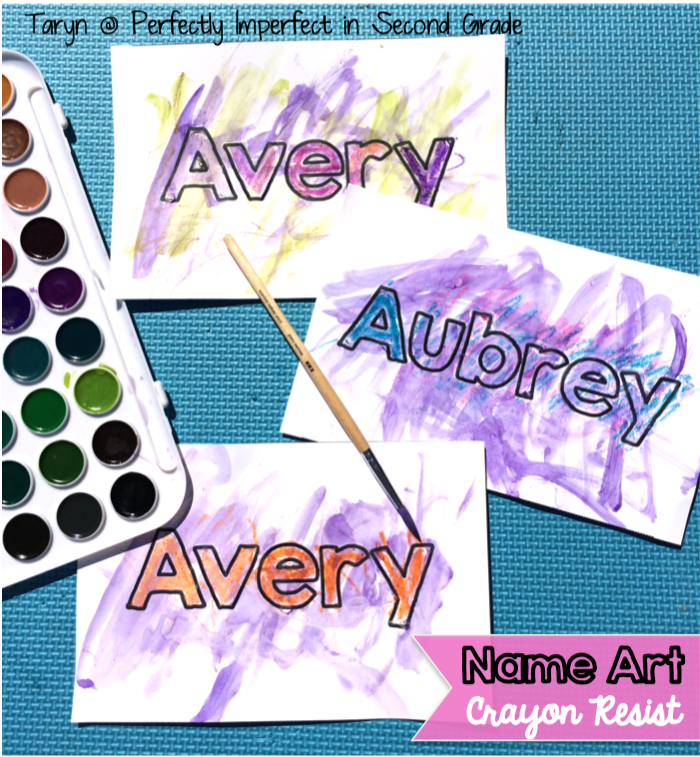
Start by typing up each child's name. I used Kimberly Geswein's font Second Chances Solid which is free for personal use. Then I changed the text fill to No Fill and added thicker black lines giving me the outlined text you see below. I fit two names per page, then cut each page in half.
Next, trace the letter lines with white glue. It's best if there are no bubbles in the line of glue so move steadily and avoid tipping the glue bottle up and down while writing. I kept a toothpick near by for popping bubbles at the end. Let it dry completely.

Now colour with crayons! My four year old did his very best to fill in all the white inside his letters. My one and a half year old thought the bumps on her page felt pretty neat to draw over that she managed to colour just where her name was on the page. Very creative of her ;) Any one to purchase this for way too much money? The wax and glue will resist the watercolour paint allowing the black outlined text and colours to show through the paint.
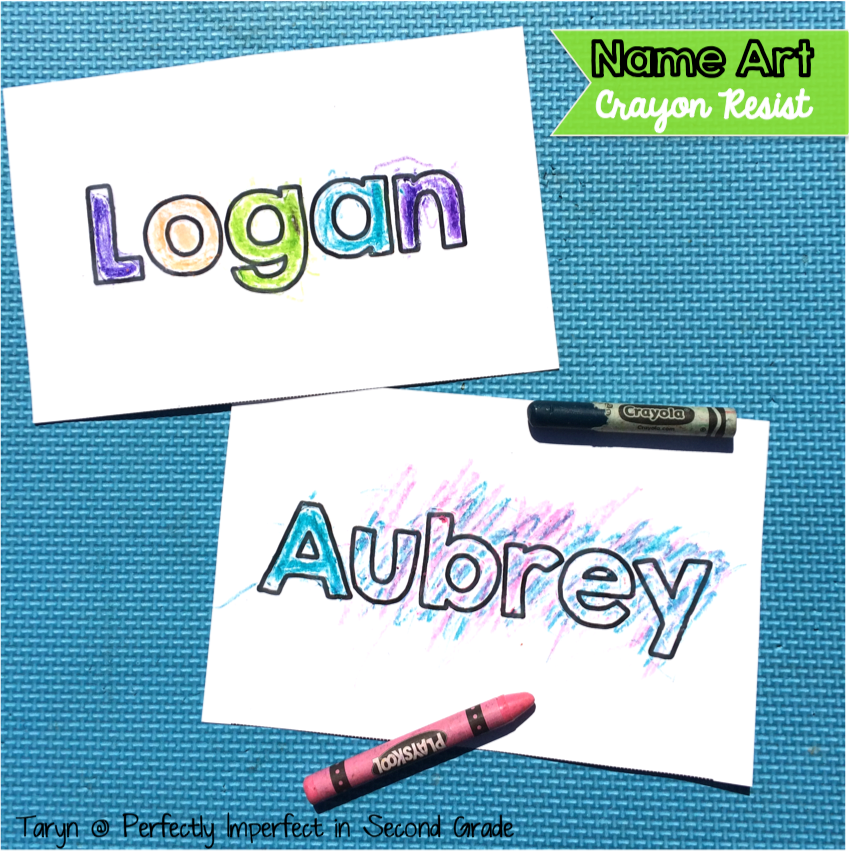
Then it's time to paint and watch those beautiful crayon marks shine through!

I love how well this activity works with children over a broad age range. For the littlest one, this activity can help your toddler with name recognition. I traced my toddlers' names in glue about 20 minutes before we did the activity. The raised glue line makes tracing and colouring the letters a breeze for little hands just learning how to write.
Grade 2 students can do this same activity, but allow them to trace their own letters with glue. Children who struggle with fine motor skills may need your support as a steady hand is helpful. I found a Q-tip worked well for wiping away extra glue. Tell your students that this is great practice for making "bubble letters" as that seems to be a favourite request. According to my class each year, only the teacher and one or two special students are capable of making bubble letters. Now they can all do their own name!


